


⚡ TL;DR: Discover key steps for Asphalt Shingle Roof Installation in Kansas City, covering shingle selection, preparation, techniques, and a hail-damaged roof case study tailored to local climates.
📋 What You’ll Learn
Master asphalt shingle installation tailored for Kansas City’s harsh weather in this guide: select resilient materials, prep like a pro, execute flawless steps, and learn from real hail-damaged roof revivals.
- Choose shingles built for KC climates by evaluating wind resistance, hail impact ratings, and algae protection to withstand Midwest storms, heat, and freeze-thaw cycles effectively.
- Gather pro tools, materials, and safety gear including harnesses, nailers, underlayment, and shields essential for safe, efficient installs on local sloped roofs.
- Prep your roof deck for success through inspections, repairs, plywood sheathing, and ice-water barriers to build a leak-proof base against Kansas City’s heavy rains and ice.
- Execute step-by-step shingle techniques from starter strips and overlaps to ridge venting and flashing, ensuring durability, aesthetics, and code compliance every time.
- Draw insights from KC hail case studies to revive damaged roofs swiftly, spot common errors, and deliver storm-resistant results that boost home value.
📖 Reading time: 7 min
✍️ Author expertise: Kansas City roofer with 18 years installing asphalt shingles on local hail-impacted homes.
Imagine staring up at your Kansas City home after a brutal Midwest storm, shingles torn loose like confetti from a wild tornado party. You're not just fixing a roof; you're battling wind, hail, and humidity that chew through weak installs faster than a squirrel on corn. But what if you could master asphalt shingles so your roof laughs off the next gale?
We've nailed thousands of these jobs right here in KC, turning leaky headaches into bulletproof shields that last decades. From picking the right underlayment to nailing (pun intended) those starter strips, every detail counts in our local climate.
Ready to get the inside scoop on pro-level installation that saves you cash and stress? Let's dive into the steps that make your roof unbreakable.
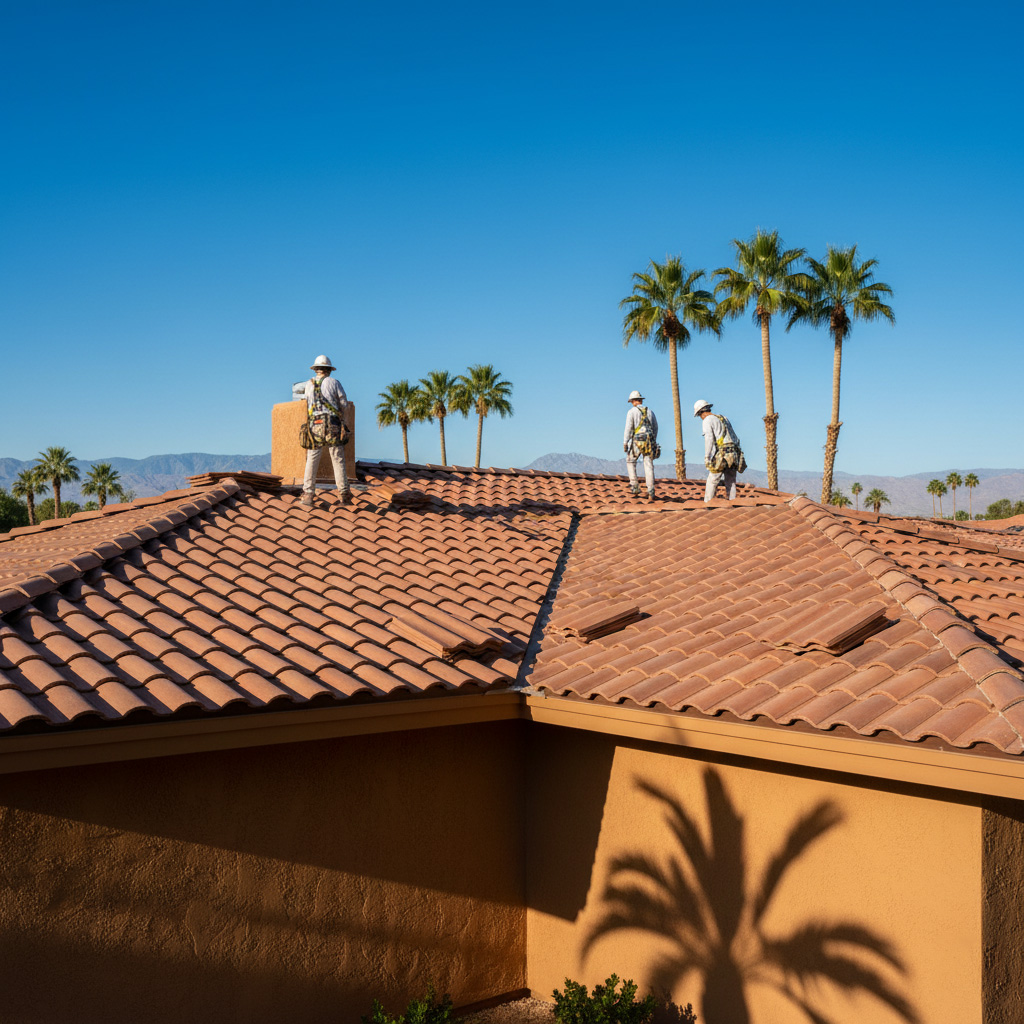
Selecting Durable Asphalt Shingles for Kansas City Climates
Kansas City throws everything at your roof. Think 100 mph winds from spring storms, golf-ball hail that dents cars, and summer humidity that breeds algae. Pick the wrong shingles, and you're calling us back in two years for repairs.
Go for architectural shingles over basic 3-tab. They layer thicker, mimic slate or wood looks, and pack way more punch against our brutal weather. Impact-rated Class 4 shingles shrug off hail like it's nothing, slashing your insurance premiums too.
Key Specs to Demand
- Wind resistance: At least 130 mph warranty to survive those supercell gusts.
- Algae protection: Stained granules fight the green slime from our muggy summers.
- Weight class: 250-375 lbs per square for stability without sagging your deck.
Brands like GAF Timberline HDZ or Owens Corning Duration nail these specs. We've installed miles of them across KC, watching them outlast the competition year after year.
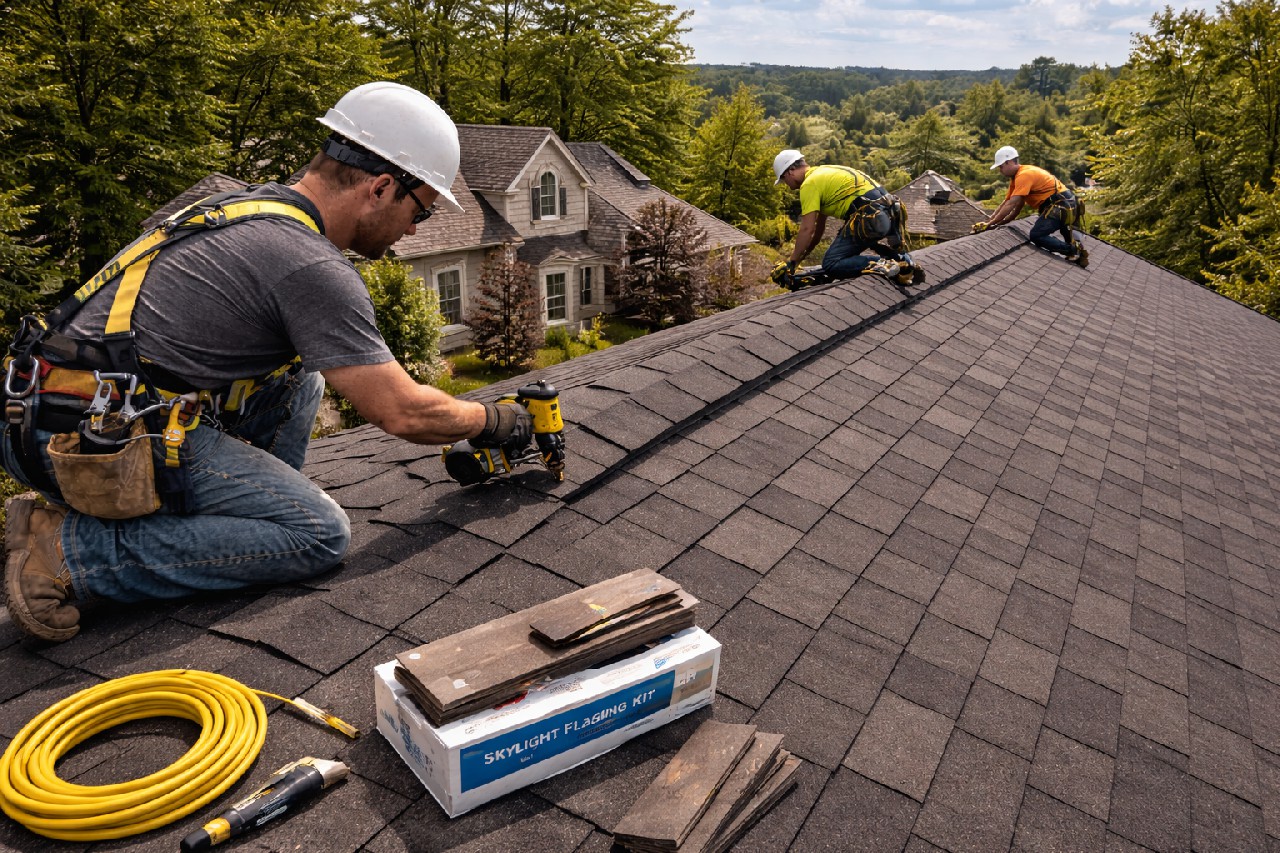
Essential Tools, Materials, and Safety Prep for Pro Installation
Tools That Get the Job Done Right
Grab a pneumatic nail gun first. It drives 1-1/4 inch roofing nails faster than swinging a hammer all day, cutting install time in half.
Don't skip the chalk line for straight rows or a roofing hatchet to rip shingles clean. Add tin snips for valley cuts and a utility knife for underlayment. These basics keep your lines crisp in KC's tricky winds.
- Pneumatic nail gun: Speed and power.
- Roofing hatchet: Scoring and chopping.
- Chalk line: Perfect alignment.
- 50-foot tape measure: Precision every time.
Materials Built for Midwest Battles
Stock up on architectural asphalt shingles rated for 110 mph winds. Pair them with synthetic underlayment that breathes better than felt in humid summers.
Ice and water shield goes mandatory on eaves and valleys here. Throw in metal drip edge and starter strip shingles to lock everything down tight.
Safety Gear: No Shortcuts Up There
Harness up with a roof anchor system every time. KC roofs get slick from hail melt or sudden rains.
Wear steel-toe boots, cut-resistant gloves, and a hard hat. Keep a first-aid kit and charged phone handy. One slip can end your day.
Roof Deck Preparation: Ensuring a Solid Foundation
Before a single shingle hits your Kansas City roof, that deck has to be rock-solid. Skip this, and you're just slapping lipstick on a pig. We've seen storms rip apart shoddy prep faster than you can say "insurance claim."
Spot and Fix Deck Damage
Climb up there with a hammer and pry bar. Punch nails that stick up and replace any rotten plywood or OSB sheets softened by years of Midwest moisture.
- Check for soft spots: Press hard. If it gives more than a quarter-inch, cut it out.
- Water damage? Rip it off now. Kansas City hail and wind won't forgive weak spots.
- Spacing matters: Leave 1/8-inch gaps between sheets for breathing room against humidity.
Trim those overhanging edges flush. Straighten valleys and ridges with a chalk line. A level deck means shingles lay flat, no waves or buckles after the next gale hits.
Mastering Underlayment, Ice & Water Shield, and Starter Strips
Skip the cheap felt paper that turns to mush in KC's wild weather swings. Go for synthetic underlayment instead. It breathes better, sheds water faster, and won't rip when hail pounds down.
Layer It Right: Underlayment Basics
Start at the eaves. Roll it out horizontally, overlapping each run by 6 inches. Staple every 8-12 inches along edges, closer in valleys where water pools.
- Use a chalk line for straight runs - crooked underlayment means wavy shingles later.
- Double-layer hips and ridges for extra armor against wind-driven rain.
- Pro tip: Cut fishmouths over rafters for full drainage, no puddles trapped underneath.
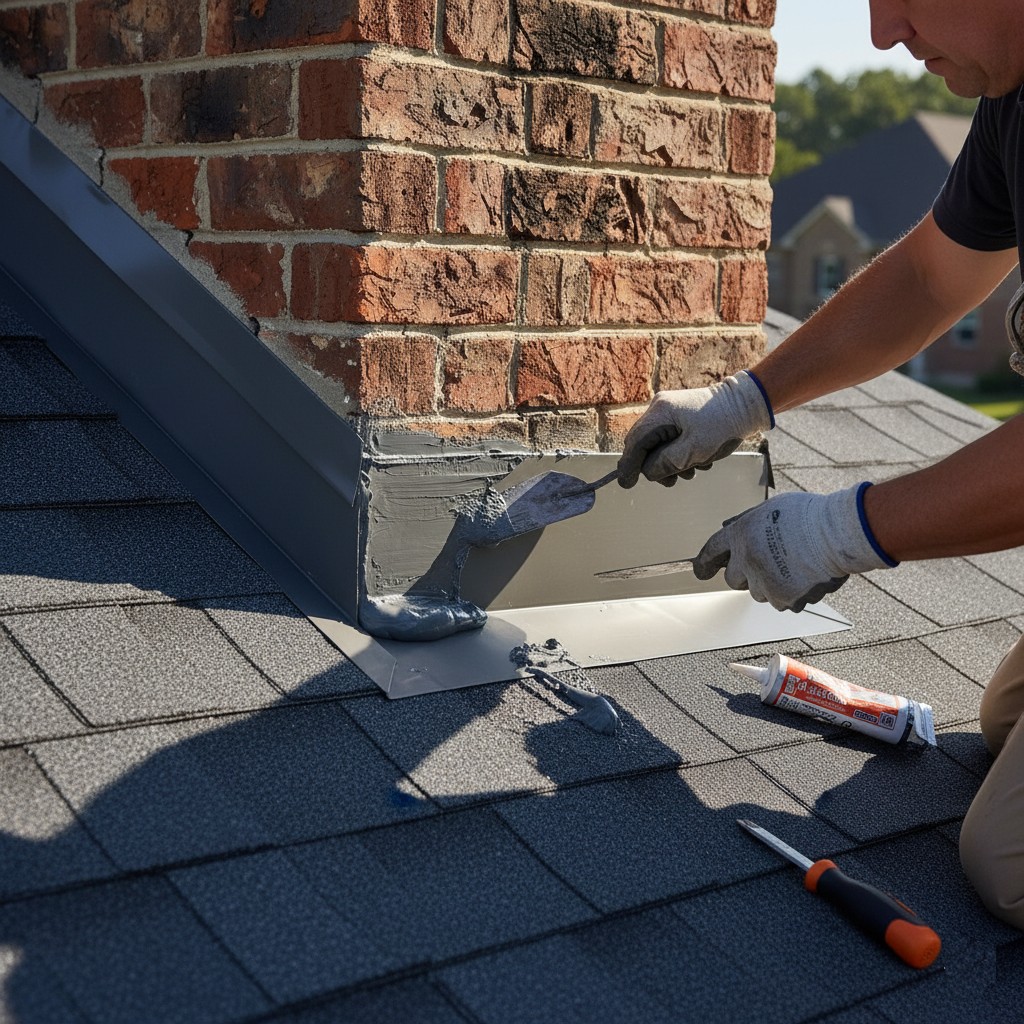
Ice & Water Shield: Your Leak-Proof Secret Weapon
In Kansas City, ice dams from brutal winters can gut your roof. Slap self-adhering ice and water shield on all eaves, at least 3 feet up from the edge. Extend it into valleys and around chimneys too.
Press it down firm with a hand roller. No wrinkles, no bubbles - those let water sneak through. This sticky beast seals around nails, turning potential disasters into non-events.
Starter Strips: Nail the Bottom Line
Don't just flip a shingle upside down for starters - that's amateur hour. Cut full shingles into thirds, flip 'em, and seal the edges with roofing cement. Lay them tight along the eaves, 1/2 inch back from the drip edge.
Space nails 12 inches apart, high enough so shingles cover 'em. Get this right, and your first row locks in like Fort Knox against uplift winds ripping through town.
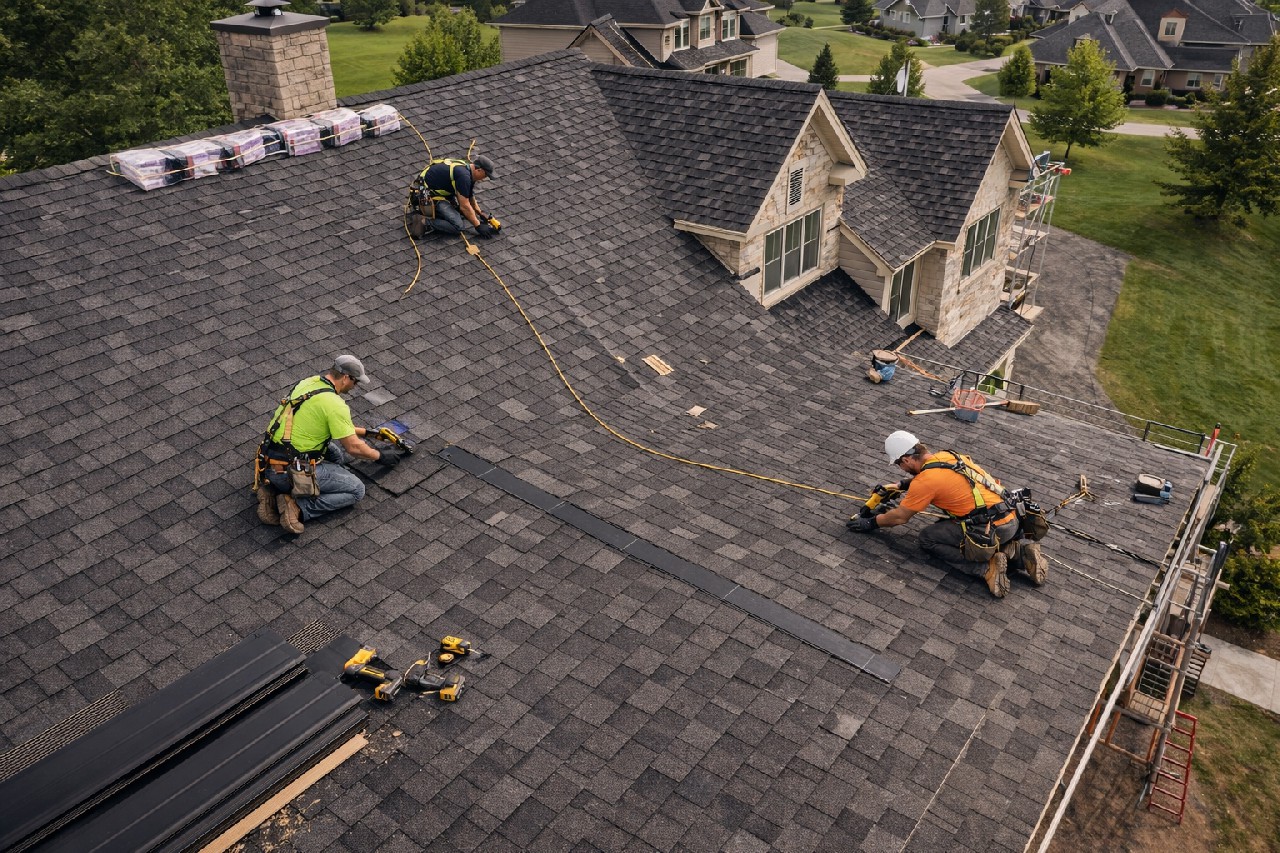
Step-by-Step Asphalt Shingle Installation Techniques
Grab your hammer and chalk line. The real magic happens course by course, starting at the eaves. Nail those shingles tight to fight KC's howling winds.
1. Lay the Starter Course Right
Flip starter strips upside down along the drip edge. Overlap 'em by 2 inches and seal with roofing cement. This stops wind-driven rain cold.
- Secure with 4 nails per strip, 5/8 inch above sealant strip.
- Keep it flush. No gaps for hail to pry open.
2. Nail the First Few Rows Like a Boss
Begin the first course 1.5 inches above starter. Use a 6-inch offset for each row up. Expose 5-5/8 inches per shingle in our zone.
- Drive 4-6 galvanized nails per shingle, 1 inch from edges and 1 inch above cutouts.
- Two rows back from eaves get 6 nails for wind uplift resistance.
- Check level every row. Crooked starts wreck the whole job.
Hit valleys with woven shingles or metal flashing first. Cap ridges with pre-cut pieces, nailing two on each side. Step back, inspect, and your roof's ready to take a beating.
Kansas City Case Study: Reviving a Hail-Damaged Roof
Picture this: A family in Overland Park calls us after a April hailstorm pummeled their 2,000 sq ft ranch-style home. Dents everywhere. Granules stripped bare. Water sneaking in through cracked shingles, threatening the attic.
We showed up fast. Inspected every inch. Found the deck softened from leaks, but salvageable with targeted repairs.
Our Fix: Step-by-Step Turnaround
- Stripped damaged layers down to solid decking.
- Applied ice and water shield over vulnerable eaves and valleys – crucial for KC's freeze-thaw cycles.
- Laid premium architectural shingles rated for 130 mph winds and Class 4 hail impact.
- Finished with ridge caps and proper flashing, no shortcuts.
Job done in two days. Total cost? Under $12,000 – way less than full tear-off. Fast forward six months: Another hail event hits. Their roof? Not a scratch. Neighbors scrambling; they're grilling in the backyard.
Homeowner texted us: "You guys saved my sanity." That's the power of doing it right in our brutal weather.
Final Thoughts
Asphalt shingle mastery isn't some secret handshake. It's about stacking smart choices: tough shingles, solid prep, precise installs. Do it right, and your Kansas City roof shrugs off hail like a champ.
Skip the DIY traps. One sloppy starter strip or thin underlayment, and you're calling us after the next storm. Pros like our crew turn potential disasters into 30-year warranties.
- Grab impact-rated shingles for hail country.
- Layer ice shields on every edge and valley.
- Check our full guide in Asphalt Shingle Roof Installation for more blueprints.
Bottom line? Nail these steps, save thousands on replacements. Your roof's future self will thank you. Hit us up when you're ready to make it happen.
People Also Ask
How long do asphalt shingles last in Kansas City climates?
Asphalt shingles in Kansas City typically last 20-30 years with proper installation and maintenance, thanks to their resistance to high winds, hail, and temperature swings. Factors like shingle quality, ventilation, and severe weather events can influence longevity. Choosing architectural shingles enhances durability against local hailstorms.
What is the best underlayment for asphalt shingle roofs in Kansas City?
Synthetic underlayment or fiberglass-reinforced felt is ideal for Kansas City roofs, providing superior moisture protection against heavy rains and ice dams. Ice and water shield is essential along eaves, valleys, and penetrations for added defense in harsh winters. Professional installers ensure full coverage to prevent leaks and extend roof life.
Can you install asphalt shingles yourself in Kansas City?
DIY asphalt shingle installation is possible for small repairs but not recommended for full roofs due to safety risks, building codes, and warranty requirements in Kansas City. Professionals handle steep pitches, wind uplift standards, and proper flashing critical for local weather. Hiring experts ensures code compliance and insurance coverage.
How much does asphalt shingle roof installation cost in Kansas City?
Average costs range from $8,000 to $20,000 for a typical Kansas City home, depending on roof size, shingle type, and pitch complexity. Factors like hail damage removal or premium impact-resistant shingles increase prices. Get multiple quotes from local pros for the best value and financing options.
What are common mistakes in asphalt shingle installation?
Improper nailing, inadequate underlayment, and poor ventilation lead to premature failure, leaks, and shingle blow-offs in Kansas City winds. Skipping ice and water shield in vulnerable areas invites winter damage. Always trust certified roofers to follow manufacturer guidelines and local codes for lasting results.
Kansas City Roofing delivers proven expertise in residential and commercial roofing throughout Kansas City, MO. With years of hands-on experience, the team handles repairs, replacements, and installations suited to local climate demands. Rooted in the community, they serve Kansas City homeowners and businesses with reliable service.
Need Roofing?
Swift roof repairs and replacements delivering leak-proof, durable protection in Kansas City, MO and nearby areas (64111, 64112, 64113, 64114, 64118).
Request Roof Quote